Tips on Drawing Fundamentals and Learning Anatomy from Stan Prokopenko

Stan Prokopenko's suggested flowchart of learning to draw.

As you know, I am a HUGE fan and student of Stan Prokopenko's drawing instruction. I started with his free instruction that inspired me to purchase his Figure Fundamentals course. When he announced an anatomy course, I snatched that one up, too. For me, his way of teaching has overwhelmingly been the most effective.


For decades, I struggled with improving my drawing because I knew I was supposed to be drawing a lot, but I didn't know what to draw a lot of. This question led to paralysis which led to lack of drawing which led to lack of developing drawing skills.

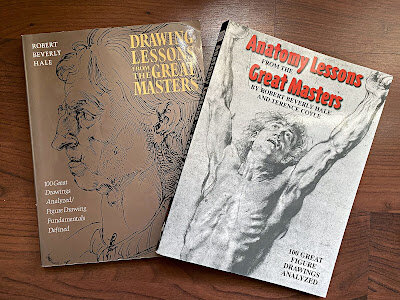
The internet helped greatly with my what-to-draw paralysis. First, I discovered (initially for free) the Famous Artists Courses instruction. It's because of those courses that I finally learned to see everything as a three-dimensional form. (As of this writing, the Famous Artists School is in the process of migrating their website and will return in 360 days.)

Second, I eventually stumbled upon Proko when I Googled "how to draw the head from any angle." His clear and concise instruction came up and I've been a student of his ever since.

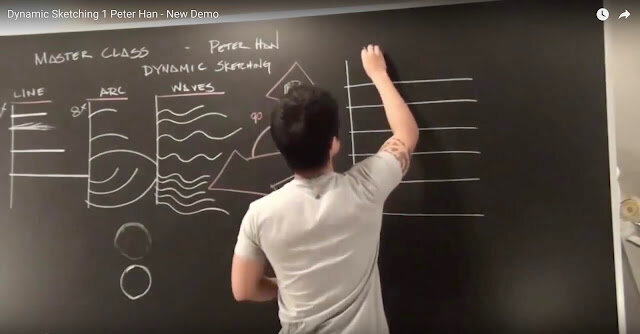
If you want to draw better but are overwhelmed, like I was, about what to study, Proko addresses these issues in the videos "What are the Fundamentals? and "How to Learn Anatomy". He and fellow draftsman, Marshall Vandruff (whose $12 perspective course is one of the best drawing instruction bargains you'll find) developed a downloadable courses/topics of study flowchart that also is helpful.

Here are the top points I got from the "How to Learn Anatomy" video:
  1. Know gesture and structure before studying anatomy. [For my purposes, I added figure proportions which I felt I needed as well]
  2. Common anatomy mistakes:
    • thinking about contours instead of in 3D
    • stiff drawings (lacking gesture)
    • drawing random bumps instead of knowing what those bumps are and represent
    • not remembering origins and insertions of muscles correctly. But you can take liberties with inaccurate anatomy if it looks GOOD
    • shading too soon. Don't shade until know how to draw cross-contours
  3. Mannequinization of the figure goes on top fo the rhythms
  4. Likes learning anatomy outside-in
    • even learning gesture and structure is outside to inside. Structure and gesture involve simplifying outside forms. 
    • then, learn inside out with bones, then muscles
  5. Vandruff: two reasons to put cross contours around bones—
    • bones are long you can forget its original shape. The cross contours remind you of the bones shape.
    • bones change shape based on their position so the "rubber bands" of cross contours help show the shapes
  6. Stay away from Bridgman until know anatomy because his teachings and diagrams need to be interpreted
If you like this post and blog, click the blue "Follow" button on the right to become a Follower! And leave a comment below. I respond to all comments.

Thanks for reading!

Taurus February Crystal Reading


The following descriptions of crystals are from Judy Hall, trained healer and counsellor. Judy has been psychic all her life and has a wide experience of many systems of divination and natural healing methods.

I was born under the sign of Taurus. So if you were, too, here's our crystal reading for February:

Eye of the Storm (Organs/systems—adrenals, kidneys, etheric DNA coding, immune system. Applications—stress, blood pressure, chemo support, cellular healing). A safe haven for your soul, a calm center no matter what upheavals may occur.


Golden Healer (Organs/systems—all, etheric blueprint. Applications—multipurpose master healer for all systems). Imbued with powerful, transformative healing energies.


Purpurite (Organs/systems—cellular memory, cardio-thoracic and circulatory systems. Applications—stamina, bruises, bleeding, pustules, blood purification, regulating the pulse). Grounds high-frequency energy harmonizing the physical body to the new vibration.


These crystals were pulled by WaterBaby Tarot. Her reading is that we Taureans are working through some stuff. We're silent, sad, bummed, disappointed about something. Issues with leadership. It's not negative or aggressive energy, just some wavering in skills or confidence as a leader. Advanced, evolved energy.

Go here for more of WaterBaby Tarot's earth signs reading for February.

Do I know what any of this means? Nope! I'm just going to take it as a sign to keep on working!

If you like this post and blog, click the blue "Follow" button on the right to become a Follower! And leave a comment below. I respond to all comments.

Thanks for reading!

Don't Break the (Creative) Chain–January 2020


I learned about this from Jerry Seinfeld.

He had a similar chart for the goal of writing one joke per day.

I've been using these charts for several years for several projects. It's an easy, daily reminder of whether or not I've made the effort to draw. I'll admit, I'm sometimes too generous with my green checkmarks—if I draw for 5 minutes, I count it as a draw day!

It's also a clear way to evaluate and figure out why there are red X marks. I was consistent the first 13 days of the year. Then I was diagnosed with a neurological disorder, focal dystonia of the foot, that's been hindering me since August, 2018. Notice how I used my depression about my condition to not draw.

Not. Good.

Things improved slightly the next week but I have yet to get back into a consistent practice.

Now I have something to aim for in February!

If you like this post and blog, click the blue "Follow" button on the right to become a Follower! And leave a comment below. I respond to all comments.

Thanks for reading!

Designing a Logo–Step 7: The Project Takes a Questionable Turn


The first step of designing a logo was research.

The second step was word associations to brainstorm ideas.

The third step was thumbnail sketches.

The fourth step was designs in black and white.

The fifth step was designs in black and white feedback and revisions.

The sixth step was designs in black and white feedback and revisions part 2.

At this point I was pleased with my work, the way it was being received and the overall relationship with the client. 

But then…the client responded to the second revisions…and things took a turn.

The client showed the designs to other people who expressed reservations. First concern: since many of their congregants work for the Target company, they felt that the labyrinthine logo looked too much like a target.

Hmm…same shape and feel but sufficiently different, yes?

Second concern: the client was put in the uncomfortable position of having to explain the significance of the two logo designs. The client was questioned as to what the designs had to do with the concept of “Living the Love of Christ."

They therefore concluded that they needed to "change direction" (oh. crap.) and make the words “Living the Love of Christ" the basis of the logo.

The client thoughtfully explained what they had in mind for the new direction and included visual references.

Needless to say, I wasn't happy…


…because what they were asking went against everything I had learned and believed about logo design. They were confusing the purpose of a logo with that of a tagline.

I wisely took two days to respond and collect my thoughts. I came up with the most professional yet direct phrasing I could think of. My response was:
My concern is that the purpose of the logo is being misunderstood. A logo is meant to be a simple suggestion or indication that identifies. Its function is not, however, to describe or explain…
Therefore I will not be able to design a new logo based on the direction you want to go. If, however, you and your team see further ways for the current ideas to be adjusted, I can accommodate those changes. Of course I will understand if you decide to proceed with another designer.
Thanks for the opportunity to work with you, it’s been fun!
It's important to note that I was completely willing to walk away from this paying freelance opportunity, an opportunity I got from a former high school classmate!

But I saw that going in the direction they wanted would turn into a hellscape for me trying to accommodate what I felt to be a misguided vision. Nothing good would come out of this for me is I continued.

In the next installment, I'll explain how the client received my response and how we proceeded.

If you like this post and blog, click the blue "Follow" button on the right to become a Follower! And leave a comment below. I respond to all comments.

Thanks for reading!

Moebius's "Arzach" Animated—Page 2, Panel 1

Original Moebius panel from "Arzach."

This first piece of animation went surprisingly quick and easy. Removing Arzach and the pterodactyl from the background and filling in the hole they left required minimal Photoshop work as did creating the moving cloudy sky background.

The next step was a little more complicated.

First, there was a LOT more retouching. Part of the appeal of Moebius's work are the wonderful lines and dots he uses to indicate texture. Recreating those lines and dots was a lesson in patience…and a lot of thinking. Because Moebius always placed texture marks with a purpose and consistency. In the gaps, I had to think about what marks were being used, where they should be and why. A useful exercise.

Second, as my hand turned the page of the book, the panels on the next pages were revealed:


I wanted, however, to start with a blank page and have the effect of the panel frames and animation appearing on the page. So I needed to mask all of the drawings on the next two pages.

It took some Googling to find out how to mask a moving object but after some searching I found the right tutorial and achieved the effect I imagined:


With that done, I could reveal the art on the page as I imagined:


If you like this post and blog, click the blue "Follow" button on the right to become a Follower! And leave a comment below. I respond to all comments.

Thanks for reading!

It's FINALLY Making Sense!

My first two artistic anatomy study guides. Notice the wear on them. I asked my parents to get me "Gray's Anatomy" when I was in high school.

When I was 25-years-old, I rented my first apartment in Brooklyn, NY. It was in Park Slope, roach-infested, had a drug dealer living on the first floor (who liked to vacuum the hall) and was almost broken into one day while I was at work (thank goodness I spent the several-hundreds-of-bucks to install a gate on the fire escape window. Otherwise my few belongings would've been stolen and it would've been my fault for not properly locking the window.)

I'd wake up early every morning (which was scary because…roaches), sit at the counter with "Gray's Anatomy" and the 1957 edition of Fritz Schider's "An Atlas of Anatomy for Artists," trying to learn artistic anatomy so I could pursue my dream of being an animator.

I tried.

And tried.

But trying to remember the Latin names of the muscles and their origins and insertions was impossible.

Now it's almost 26 years later, and finally—FINALLY!—I'm beginning to understand human anatomy.

Why am I just now beginning to understand anatomy? Better resources and instruction.

For years I took classes at the Arts Students League and studied the  books above but it just never came together for me. When I submitted my anatomy class drawings to MTV's "Daria" for an animation job, I got a note back saying I should…learn anatomy! (Yeah, that one was a soul-crusher especially since there was barely any animation in "Daria.")

But once I started learning from online instructors—particularly Stan Prokopenko but also Michael Mentler and Ron Lemen—combined with better books—particularly "Atlas of Human Anatomy for the Artist" by Stephen Rogers Peck plus Robert Beverly Hale and Thomas Coyle's "Albinus on Anatomy"—things began to click.

Stan Prokopenko (proko.com)

Ron Lemen
Michael Mentler (tsofa.com)

Peck's book has excellent drawings that give a sense of the dimensionality of the bones and muscles; the Albinus book presents the muscles individually to better understand their origins and insertions.


These two books have been essential to me learning artistic anatomy.

These books, especially that on the right, have tremendous insights into how the masters approached drawing the human figure.

An additional important resource has been the internet and 3D images. One of the great things about Proko's anatomy course is that he provides an online, 3D image of the bones and muscles. Being able to see the bones and muscles from any angle allowed me to understand the dimensionality of these things. And understanding that dimensionality helped me draw that object better.

I've also discovered that no one instructor has all of the answers and that combining teachings gives you a more complete understanding of what you're studying. So right now I'm in the process of learning human proportions by combining the teachings of Michael Mentler (whose system of measurement is the same as Robert Beverly Hale's) and Ron Lemen. I like both of their methods; they have similarities and overlap which reinforces my learning.

I'm going to share with you the best of their methods once I'm done learning it myself. I'm confident that if you've had problems understanding human proportions, the method I share with you will be of use. I'm also looking forward to applying the Mentler/Lemen figure proportions to Andrew Loomis's teachings which will make it easier to draw a figure at extreme angles.

From Andrew Loomis's "Figure Drawing for all It's Worth"—I can't wait to deconstruct this!

And THIS!

If you like this post and blog, click the blue "Follow" button on the right to become a Follower! And leave a comment below. I respond to all comments.

Thanks for reading!

Designing a Logo–Step 6: Black and White Logo Feedback and Revisions Pt. 2

The first step of designing a logo was research.

The second step was word associations to brainstorm ideas.

The third step is thumbnail sketches.

The fourth step is designs in black and white.

The fifth step is revising the designs after getting feedback.

More feedback from the client. At this point we all agreed that 2 of the designs simply weren't working so we dropped those entirely. The remaining 2 designs needed some changes in the line quality and the design of some shapes.

Here are the revisions:


If you like this post and blog, click the blue button on the right to become a Follower! And leave a comment below. I respond to all comments.


Thanks for reading!

Making Moebius's Arzach Move

I love Moebius's art so much that I wanted to see it move. So last year I started a project animating panels from Moebius's "Arzach."

There have been a few attempts to animate his work but none were that successful nor recent. I also thought it'd be easier to do this than other potential projects.

First, I had to decide how this would look. Was I going to string each panel together to make a seamless story? It became clear that taking that approach would require a lot of retouching with each panel having its edges extended to fill a 16:9 aspect ratio. I didn't want to dedicate that kind of time to Photoshopping.

Instead, I decided to maintain the integrity of Moebius's panels by limiting the movement to inside of those panels, as though you were flipping through a book with moving panels…like the newspapers in Harry Potter:


I started by recording myself turning the pages of the Arzach book using an iPhone 6 Plus. Next, I scanned the pages of the book and retouched each panel in Photoshop.

For the first page, I imagined it fitting the full screen with Arzach and his pterodactyl flying into the frame, the sky slowly moving and the figures stopping in the spot of the original book panel. This required extending the background, which was easy. More difficult was cutting the figures out and filling the hole they left. This was a challenge for the entire project because Moebius used a lot of cross-hatching and the variances of the watercoloring are difficult to mimic.

There was even more retouching on the figures to make the wings, cape and other parts move. I wasn't going for full animation, just the feeling of some movement:


The multiple images in different positions and the background were all imported into After Effects where all the animation, compositing and masking was done.

Despite the challenges, I got the look I wanted:


One of the main reasons for starting this project was to learn how to use After Effects. In future posts, I'll have tutorials explaining how I accomplished certain outcomes.

If you like this post and blog, click the blue “Follow” button on the right to become a Follower! And leave a comment below. I respond to all comments.

Thanks for reading!


Designing a Logo–Step 5: Black and White Logo Feedback and Revisions

The first step of designing a logo was research.

The second step was word associations to brainstorm ideas.

The third step is thumbnail sketches.

The fourth step is designs in black and white.

The next step was processing the client's feedback. Thankfully, the feedback was overwhelmingly positive and, even more importantly, specific. The client commented about the angles of the logos, the crispness of the lines and the movement of the shapes. All great feedback! With the substantial specific feedback, I was able to quickly adjust the logos without having to waste time searching for answers.

After going back and forth with some emails and a phone call, I sent these revised logo designs to the client:


If you like this post and blog, click the blue button on the right to become a Follower! And leave a comment below. I respond to all comments.

New Year's Confession: Learning to Draw is BORING!

It's a new year.

For me that means reviewing the goals of past years to see where I've fallen short.

And—WOW!—have I fallen short!

Year after year after year—going back almost TWENTY years!—I've had the SAME goals!

To learn anatomy; to complete several animated shorts; to socialize more; to get fit; blah, blah blah.

But I keep missing these goals, especially the drawing-related goals. So why does that keep happening?

After searching for the answer to that question, I came to an unfortunate answer: learning to draw is BORING!

That's right, I said it! I love drawing but learning to do it well—with the necessary repetitions and the strain on my brain as I desperately try to determine why my drawings are wrong—is BORING!

Gesture drawing is boring.


Drawing drills are boring.


Studying anatomy is REALLY boring!


I'll have one or two weeks of solid practice and then fall off the wagon. WAY off the wagon. Then I'll get back on the wagon only to fall off again. Then I get distracted by something else and before I know it, another year has passed and I've gotten nowhere.

So this time when I was reviewing my 2019 and thinking about what I wanted to accomplish in 2020, I admitted an uncomfortable truth: even though I love drawing, I hate practicing it.

That acknowledgement was HUGE! By saying the truth out loud, I allowed myself to feel and embrace the negative side of pursuing my passion. By embracing that negativity, it forced me to FINALLY find a way around it. And the solution I've come up with is so far working!

I determined that I need to focus on a few areas to improve my figure drawing: gesture, simplifying the torso and pelvis (the primary area of physical movement), figure proportions and drawing drills. The first good decision I made was to limit my focus to only those areas. It helps that I've finally had a breakthrough in understanding the 5 basic forms—cube, cylinder, cone, pyramid and sphere—and have developed the ability to break everything down into those forms. Now, learning to draw the figure is my primary focus.

But studying and practicing those things is boring. In order to overcome the boredom, I realized that I needed to balance it with something FUN that also helps improve my skills. The activity I found to accomplish that is copying.

Copying allows me to spend time with the work by artists whom I want to emulate. I love Moebius's work, so I copy it. I love Harvey Kurtzman and other MAD magazine artists, so I copy them. This is similar to rewarding oneself with a cookie after having eaten some kale. Well…it's actually BETTER than that because copying is healthy for one's drawing abilities while a cookie isn't but…you get my point.

I've only just started this new approach so I can't yet say if it's a success. I'll be documenting my progress here.

But I do know that at the least, drawing has become a lot less boring. 😁

Designing a Logo–Step 4: Logo Design in Black and White

The first step of designing a logo was research.

The second step was word associations to brainstorm ideas.

The third step is thumbnail sketches.

This next step is selecting which of the thumbnails to present to the client. I thought it best to present a minimum of 3 and a maximum of 5.

Once the choices are made, it's time to recreate those ideas as vector art. It's best to make logos in a vector program so that they will be resolution independent and can be easily resized for a variety of purposes.

This was a particular challenge for me because Adobe Illustrator is NOT one of my stronger programs! 

LOL!

So I had to learn really quick if I wanted to accurately translate my sketch vision to a digital format. Any time I hit a wall trying to create what I envision, a quick search online for a tutorial helps.

Also, it is important to design—whether it's a painting, illustration or logo—in black and white BEFORE designing in color. First, it's likely that the logo will end up being photocopied in black and white so it's important that it works that way. Second, if it works in black and white, it'll work in color.

These are the final designs in black and white that I presented to the client:


This step also involves selecting a typestyle:


In the next step of this series, I'll share the feedback that I got from the client and the changes made to the original designs.

If you like this post, leave a comment below (I respond to all comments!) and/or click the "Follow" button on the right! 

Thanks for reading!


Return to Drawing Drills

Concept artist Peter Han demonstrates drawing drills on a YouTube video.

Synchronicity has struck again!

While watching these Stan Prokopenko interviews with accomplished artists at Comic Con in San Diego, I was struck by how several of them said that the most basic of drawing drills should be done regularly, regardless of your experience and current skill level.

The drills they're talking about are the same drills I have done on and off over the last couple of years but always abandoned because I didn't see much use in them.

But hearing MULTIPLE artists say that these drills are essential to improving drawing skills, I dove back into them. I'm now doing a combination of Scott Robertson drills, Peter Han drills and Irshad Karim drills.

For the copying drills, I recommend drawing the original lines in pencil and using a black or other colored pen to draw over the line. With the difference in color between the graphite and the pen, it's easier to see your drawn line. For the other exercises, I use templates that I created templates and print when needed.

Here are the drills I try to do regularly:

1.  Straight lines, maintaining the same length and the same space between them (Oops, I didn't save an example of this!)

2. Draw over short, medium and long straight lines, three times each line:

I fit the draw-over-straight-lines drill on the same page as the short- and medium-draw-over-arcs drill.

3. Draw over short, medium and long arcs, three times each arc:

These are the long arcs.

4. Draw over short, medium and long wavy lines, three times each line:


5. Draw lines through a single point:


6. Draw lines from one point to another:


7. Draw curved lines through multiple points:


8. Draw ellipses then add the minor axis. For all of the ellipse drills, I use a set of 10°–80° ellipse templates to check my work. The correct lines are in red:


9. Draw ellipses around a minor axis:


10. Draw ellipses inside a box focusing on making each of its quadrants equal:


11. Draw ellipses between parallel lines:


12. Draw boxes at different angles. THIS exercise is extremely difficult, forcing you to imagine a box at a variety of angles in your head:


I recommend doing these drills regularly. They've helped me with my anatomy studies especially when I want to draw over lines accurately. And I'm confident that these mechanical drawing skills will be useful once I delve further into other types of drawing.

Tell me if you've tried these drills or if you have other or better drills!

If you like this post, leave a comment below (I respond to all comments!) and/or click the "Follow" button on the right! 

Thanks for reading!


Anatomy Practice Drawings—Sept. 2018

For these drawings, I was focused on understanding the forms and positions of the spine, ribcage, pelvis and shoulder girdle.


If you like this post, leave a comment below (I respond to all comments!) and/or click the "Follow" button on the right! 

Thanks for reading!